Materials:
- Paper
- Water
- Mason jar/bowl/container
- Large, deep bin (at least a foot deep and 2×1 foot surface)
- Sponge(s)
- Some sort of flat material or canvas for drying
- Screen
- Frame
- Stapler/Staple gun
- blender/ food processor
- Extras:
- Seeds
- Petals
- Essential oils / scents
Process (and Notes):
Day 1:
- Cut your paper into bits about the size of a quarter. Smaller is fine, larger will pose difficulties when pulping.
- Submerge the paper in water and let sit for a 24 hour minimum.
- Allowing the paper to sit seems to make the pulping process easier with less of it sticking to itself. Still, don’t let it sit more than about 2 weeks because it will begin to rot. Alternatively, you can pour this water on your plants for mulch.
- Making the filter.
- Take any backless frame for this part. I pulled a canvas off of its wooden backing and used that instead of buying a frame, but any will do.
- Cut a piece of old window screen large enough to cover your frame plus 1 in. or so.
- Place your frame flat-side down centered on the screen. Staple the screen along one end. Pull tight on the opposite side and staple, then repeat to the adjacent sides.
Day 2:
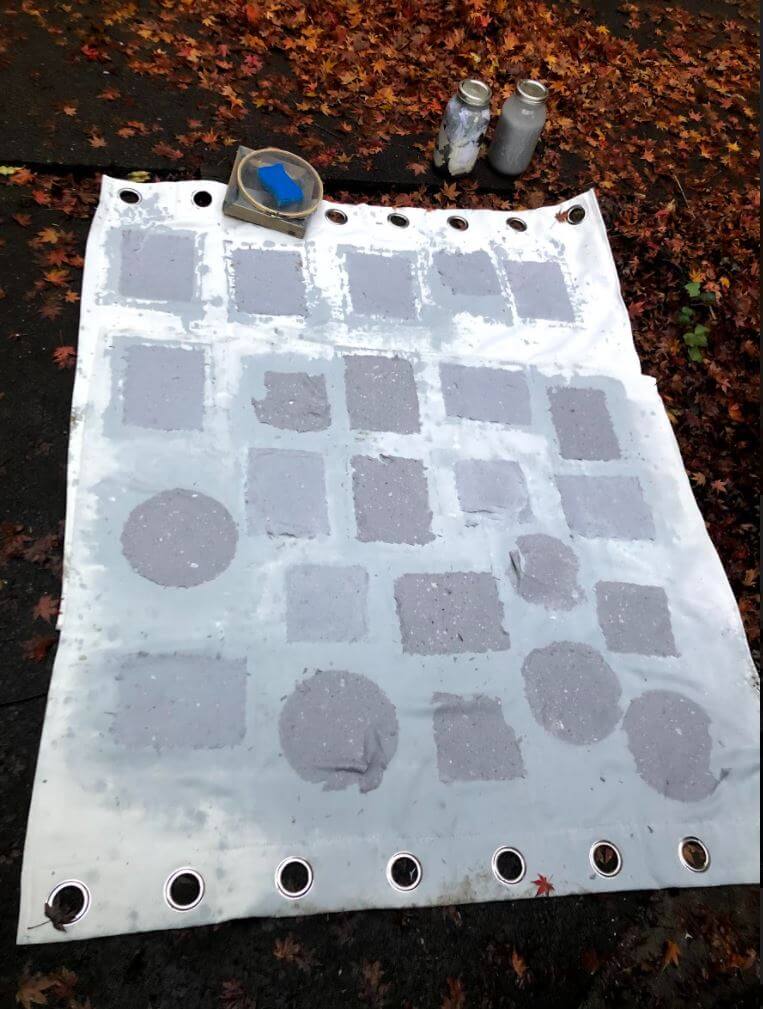
- Blend the soaked paper and water together with a hand blender or food processor. Add to a large bin and add water until there’s about a 1:5 ratio of pulp to water.
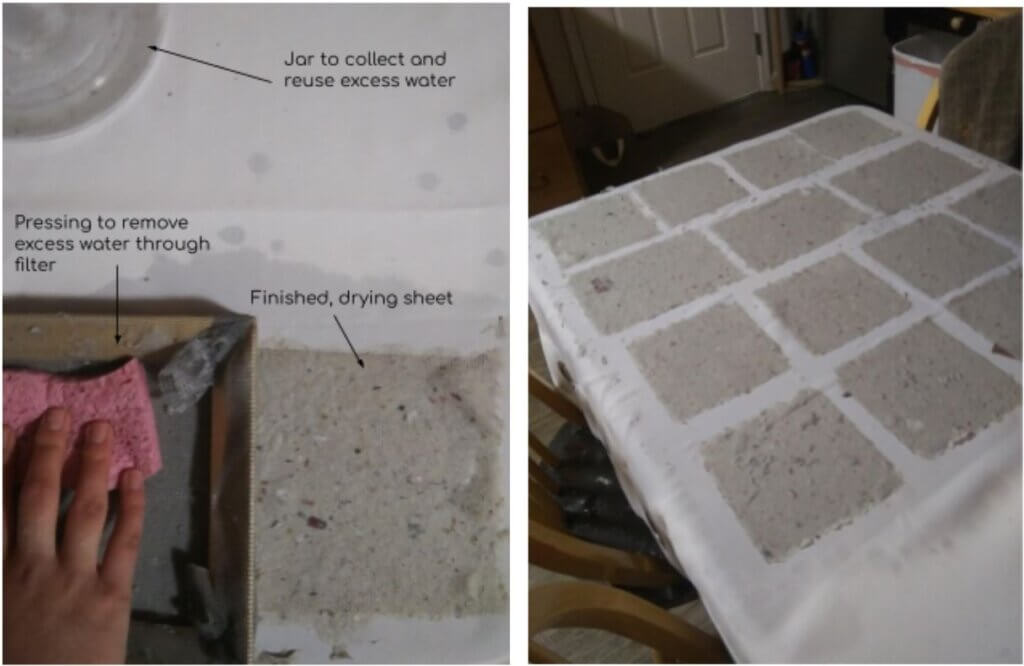
- Dip the filter into the bin at an angle and pull toward yourself while simultaneously leveling the filter until parallel to the ground, collecting a thin layer of pulp on top of the screen. Pretend you are goldmining. Let the water drain out the center of the screen.
- Scrape the boarders with your finger and use the sponge to pull excess water away from the pulp through the filter. Continue sponging away the water until it stops dripping and the pulp becomes more matte than shiny.
- Take the filter to the fabric or canvas you are using for drying and flip it pulp-side down. Sponge off the water by pressing the sponge down on the back of the filter absorbing the excess water. Squeeze out excess water and repeat. Continue until you can pull only very little water. Lift the filter from one end and tap it. Dry paper should stick to the cloth.
- Place the canvas with wet paper in the sunlight or a warm area to dry. This should be about a 24 hour dry time indoors, 5-10 hours in the sun. In cold wet conditions you can use your oven on the lowest setting. (180 or less)
–>Drying Methods
- Allow paper to dry in sun (takes 8-10 hours, depending on temperature)
- Pros:
- Quick
- No energy / eco friendliest
- Cons:
- Isn’t always sunny
- Have to work in batches
- Sometimes paper blows away
- Pros:
- Dry indoors (24 hours minimum, spending on temperature)
- Pros:
- No energy / eco friendly
- Paper dries super flat
- Cons:
- I don’t have a heater, do it takes days
- Paper can get a funny smell
- Pros:
- Dry in oven (5-10 minutes @ 170*)
- Pros:
- Fastest way to dry paper
- Makes house warm
- Cons:
- Uses energy
- Fire hazard?
- Pros:
Video Tutorial: On YouTube

A special thanks from Clay on Herbs to the writer of this article: Thanks a ton, you rock Jodi!!
Check her out on Instagram- @jodi.taelor.13